The migration of Shopify to WooCommerce is available through some services, but they can cost a fortune. Their pricing for full migration depends on a variety of factors, including the number of products, customers, and orders.
In this article we will show you how to make a transfer with no extra cost.
Step 1. Setup WoCommerce
With WooCommerce, instead of Shopify, you host your own website. In order to set up WooCommerce, you’ll need a domain name and a web hosting account.
We recommend using our BlueFlower media hosting Company. We have something to offer for the WordPress Beginners — discounted plans and free SSL certificate.
Once the hosting is purchased, you can install your wordpress website. You can sign in by clicking the ‘Log in’ button.
When you click on this, you will be brought to the WordPress administration panel. The WooCommerce plugin can now be found under Plugins » Add New Page.
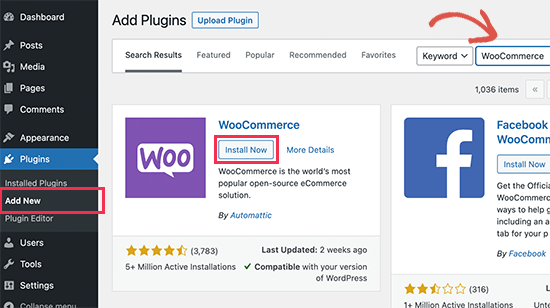
You can now install WooCommerce by clicking the Install Now button. The WooCommerce plugin will then be installed automatically by WordPress. Press the Activate button to complete the installation. To continue, click Activate.
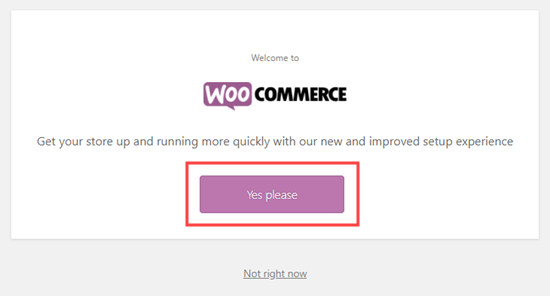
Upon activating the plugin, you’ll be taken to the setup wizard where you’ll be able to set up your payment gateway and enter your store information. To get your store set up, follow the steps on screen.
Step 2: Download your Shopify data
For this purpose you can use Shopify to WooCommerce exporter. It is free of charges. By using this plugin, you can export Shopify data in standard format and import it into WooCommerce.
Your first step should be to visit the Shopify to WooCommerce website. The next step involves entering your Shopify website URL and providing an email address.
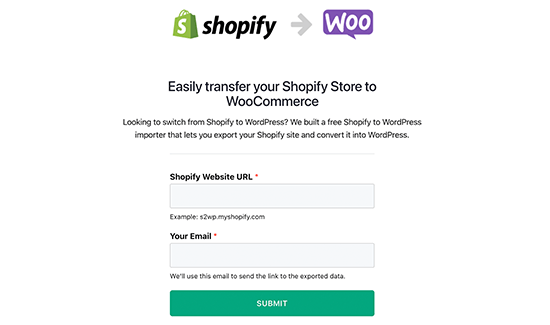
Continue by clicking the Submit button.
Once you’ve done so, you’ll be able to log into your shop’s Shopify admin section and generate a Shopify API key directly from there. The next step is to click the link for Install App.
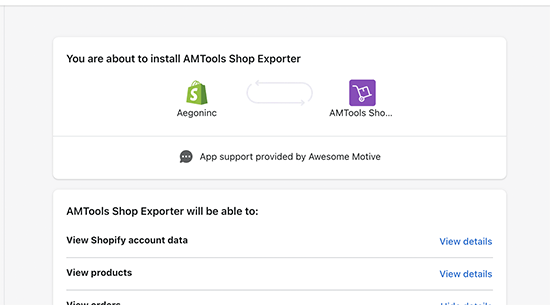
You will see the data the app is going to export by using the Shopify API on the next screen. Right now, it exports orders, products, and product categories.
In order to download the export file, you will need to provide an email address.
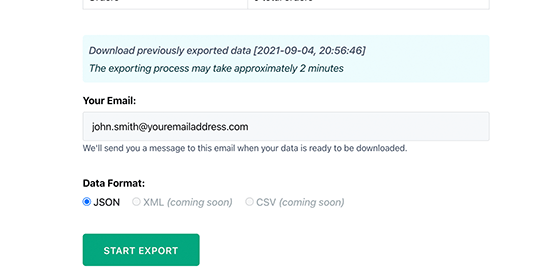
Continue by clicking the Start Export button.
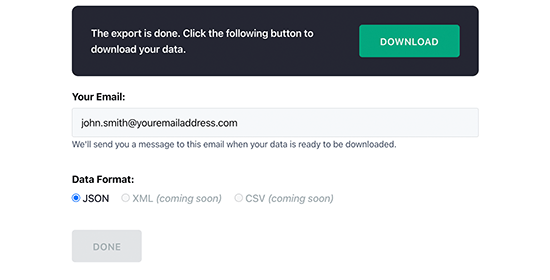
Progress on the migration will be shown in the app.
Step 3: Import Shopify Data in WooCommerce
First, you need to install and activate the Import Shopify To WP plugin. Once activated, you can find the Shopify Importer under Tools. You can choose the export file from here by clicking on the ‘Choose File’ button.
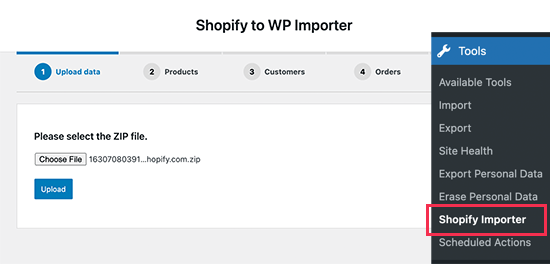
To continue, click the Upload button.
On the next page, you’ll see a list of exports that were found in your upload file. To import them into your WooCommerce store, just click the ‘Start Import’ button.
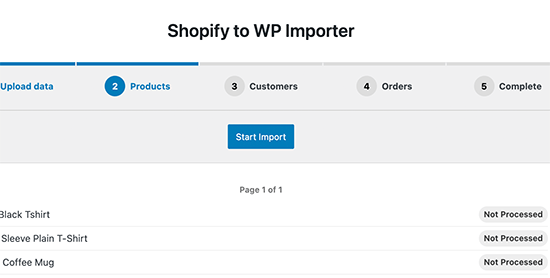
Your data will now be imported by the plugin. On the screen, you can monitor your upload progress.
Step 4: Customize your WooCommerce Store
Your Shopify data has been successfully migrated to WooCommerce, and it’s time to set up your WooCommerce store.
You will need to choose a design, install add-ons for functionality and options, and choose tools to continue to grow your WordPress website.
- Choose a Website Theme (Template).
- Create Your Own Landing Pages.
- Boost the SEO of your eCommerce site.
- Configure Conversion Tracking.
- Convert more visitors into sales.
Step 5: Setting up redirects
The redirects will automatically send search engines and visitors to your new WooCommerce store from your old Shopify one. By doing so, you avoid losing customers to the wrong website.
You cannot set up individual redirects if your store has a Shopify-branded domain name (example: yourstore.myshopify.com).
You can set up redirects between your Shopify store and your WooCommerce store if your Shopify store has a custom domain name.
Moving Your Domain from Shopify to WooCommerce
Changing your domain’s DNS settings will allow you to do so. You will need to enter the DNS server addresses provided by your new hosting provider into your domain settings.You will typically find them as follows:
ns1.hostname.com
Ns2.hostname.com
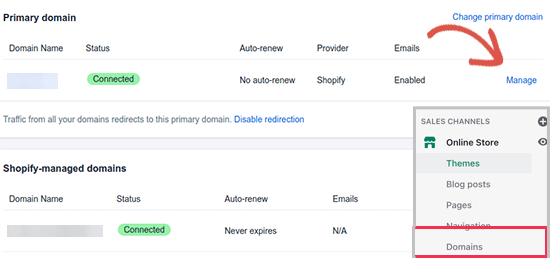
Shopify users can manage their DNS settings by logging into their accounts and going to Online Store » Domains.
Update URLs in WooCommerce
You may still be using your old Shopify branded domain for URLs in your product descriptions. Rather than searching for all those URLs one-by-one, here is how to bulk update them all at once.
Simply install and activate the the Velvet Blues Update URLs plugin.
After activating, you will need to go to Tools » Update URLs. Enter the old URL of your Shopify store and the new URL of your WooCommerce store.
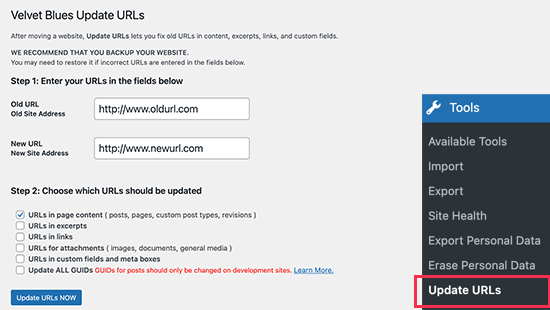
By clicking the ‘Update URLs NOW’ button at the bottom, your links will be fixed across your entire site. The plugin can be removed from your site after the URLs have been updated.
Last but not least, if you have blog posts or pages, you should redirect visitors to the appropriate page.
First, you need to install and activate the Redirection plugin.
To activate the redirection, go to the Tool » Redirection page. The setup wizard will guide you through the process.
In order to add your first redirect, you need to click the Add New button. The post or page URL should be entered in the Source URL field, followed by the new URL in the Target URL field.

Save your changes by clicking the ‘Add Redirect’ button.
There you have it! Your WooCommerce store is now set up.